Photo by Patrick Hendry on Unsplash
For the longest time, web layout has been one of the hardest problems to solve. This has primarily been due to the fact that the web was originally designed around documents and how a document flows. As the web has changed, the need for proper layout solutions have been in high demand to be added to the CSS spec.
The first item to be added was flex-box. Flexbox was designed to give better control over the layout in one direction, either row or column. It allows you to define flexible width items that will grow and shrink according to the parent container size as well as how to position the elements inline.
Though Flexbox does have rules around wrapping elements when they start to overflow out of the parent container, flex-box was never designed around creating a 2-D grid. Luckily, a new CSS specification was added shortly after flex-box: CSS Grid.
With CSS Grid we now do a few important things that we have been lacking. First of all, we can now define our layout in rows and columns at the same time. It doesn’t matter if we use a combination of explicit and implicit rows and columns definitions, the biggest thing is we no longer need a library’s n-column grid system to achieve layouts.
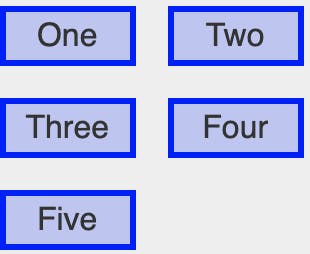
The second hugely impactful thing that was added was the concept of a gap. A gap defines the margin in between the child elements of a grid container. Though this doesn’t sound like much, this concept now allows us to achieve the much-sought-after layout where we have uniform margins in between elements, but not around the edges of our layout, like this example I stole from MDN:

To achieve something as simple as the example above in a responsive way took combinations of extradiv containers and negative margins. With CSS Grid, this can now be defined with a single line of CSS.
The gap property has been so powerful that it is, as the day of this writing, being introduced to the flex-box spec and multi-column spec and is supported by some of the browsers already.
How Do We Use CSS Grid in Components?
We now live in the age of components. Much like how atoms and molecules can be combined to create organisms, we can create simple, single-purpose components that can be composed together to build some sophisticated and amazing components. This definitely includes layout. CSS Grid works fantastically in this model and allows us to abstract out awesome layout primitives that, when combined with other primitives, can achieve some sophisticated layouts.
Before we go into these patterns, we must address the elephant in the room: Internet Explorer. Does IE support CSS Grid? The short answer is no. The more complicated answer is it actually supports an earlier draft of the CSS Grid Spec, which is no longer compliant with the current spec. So what does that mean for those of us that ‘support’ IE?
First of all, I would like to dispel the myth that ‘support’ means the same experience. Our app may support both desktop and mobile screens, as well as several other sizes in-between. While each screen size will be very similar, there is no expectation that we will have the exact same experience at each device we use. Instagram.com, for example, only allows uploading photos from the mobile version of their site and many websites will remove content, such as pictures, once space becomes a premium.
In that same vein, supporting IE does not mean that it has to be the same experience as modern browsers. The IE version of Grid is still very powerful. Maybe 80% of what you want to achieve, can be supported by the old spec and the rest is close enough. Maybe you have to write a fallback layout using flexbox. The point is, that you can stay cutting edge, while still supporting browsers that are not now cutting edge.
For the rest of this article, I am going to go through a couple of CSS Grid component patterns from easy to more complicated(which is still very easy) using React and styled-components, because they make it easy to show these patterns in a modern framework, but also because I like using them. Nothing I am showing you, however, requires either one and can be achieved, through minimal adaptation, in your tech stack. This includes vanilla CSS and HTML.
The Stack
One of the most basic, yet most used layout needs is putting one or more things on top of each other with consistent gutters in between. From form labels to paragraphs of text, to social media feeds, they all need to stack one thing on top of another with a consistent gutter. This is especially true when working in a design system with predefined layouts. This is easy enough to achieve like this:
const Stack = styled.div`
   display: grid;
   gap: 1rem;
   grid-template-columns: 1fr;
`

<Stack>
  <Header/>
  <Content/>
  <Footer/>
</Stack>
With those three lines of code, we have our Stack component. Let’s break down what each line does. display:grid turns this element into a grid-container and each one of its immediate children will be a grid-item. This happens automatically, no need to select the child elements and mess with them, these will be grid-items just by being children of an grid-container.
The next line defines the gap value, or what I prefer to call the gutter. This can be any valid CSS size value, such as px, rem, em, %, ch, vh, vwand so on. It simply puts a gutter in between, but not around, each grid-item.
The last line is how we define our columns. When we use grid-template-columns we are providing a template of how our columns should be made up. grid-template-columns takes a list of CSS size values and a template of how wide each column is and how many columns there are. For example, to achieve a 3 column layout of 100px you would simply put grid-template-columns: 100px 100px 100px; and it will automatically place each grid-item into a 100px wide column (with the gap in-between). Nothing says the columns have to be uniform, you can do 100px 500px 10vw and it would still be 3 columns, but each column would have different widths.
You might be asking, what happens if we define 3 columns, but we have 4 grid-items? The first three items will be placed in their respective columns, but when we get to the fourth item, it will be placed under the 1st item in the 1st column (once again, with the gap in-between them). This is because we have implicit rows defined that, by default, will be as tall as the tallest grid-item in the row. So when we exceed the number of columns in the template, the browser will automatically move the item into the next implied row into the next available column. There is also a property called grid-template-rows the behaves exactly like it’s column counterpart for rows.
In our example above, we are using a size value unique to CSS Grid called the fr unit which stands for a fraction. The power of fr units will be shown in the next example, but suffice it to say, it will take a width of one fraction of the available space. In our case, since we are only defining 1fr this will be the entire width of the grid-container
So to summarize, by setting the display property to grid our element will become a grid-container and at the same time, each of the children will become grid-items. We are setting a gap of 1rem to that will define the space between the grid-items. Finally, we are explicitly declaring a single column width of 1fr or one fraction, which effectively is all the available width.
In a real layout, we would want to vary our spacing by exposing the gap prop, typically mapping a more semantic name to an underlying spacing length. The convention I like the most is t-shirt sizing, so we can adjust the above props to be like this:
const sizes={
 xs:'0.125rem',
 sm:'0.25rem',
 md:'0.5rem',
 lg:'1rem',
 xl:'2rem',
 xxl:'4rem'
}

const Stack = styled.div`
   display: grid;
   gap: ${props => sizes[props.gutter] || sizes.lg};
   grid-template-columns: 1fr;
`

<Stack gutter='xxl'>
  <Header/>
  <Content/>
  <Footer/>
</Stack>
Now we can declare a gutter size otherwise it will default to lg size which is 1rem. Once again, this is how you could do it with styled-components, but you are not limited to it.
The Split
Another very common layout need is to put one thing next to another. In fact, I would have to say that, after vertically centering an element, putting something next to something else has got to be “THE” struggle of the web. This is where the Split component comes in. Its whole purpose is to take one thing and put it next to something else while keeping that consistent gutter in-between. Let's look at how it is made:
const Split = styled.div`
   display: grid;
   gap: ${props => sizes[props.gutter] || sizes.lg};
   grid-template-columns: 1fr 1fr;
`

<Split gutter='xxl'>
  <Main/>
  <Aside/>
</Split>
The Split is almost identical to the Stack, except one important difference. We are now declaring two columns of 1fr each. When using fr units the browser will first figure out how much space is left after calculating all gaps and non-fr lengths, such as px or % and then it will divide that remaining space.
In our above example, by declaring two columns of 1fr, we are effectively doing a 50% split. You might ask, isn’t that the same as 50% 50%? Even though it seems like it is, it’s not. Remember how I declared that the browser calculates the remaining space? If we were to use 50%, this doesn’t take into account the 1rem gap, so we would end up creating an overflow of 1rem, which is not what we want.
The other powerful thing about 1fr units is that we can describe our column sizes in terms of ratios. More often than not, we probably don’t want to split evenly in half, we might want a 1/4 split or a 2/3 split. This is where the fr units really shine. If we changed the template to be something like 2fr 1fr, the browser will divide the remaining space into 3, and give the first columns two of those part and the second column 1 part, giving us a 2/3 split. In fact, we can declare a whole list of these options like this:
const fractions={
 '1/4':'1fr 3fr',
 '1/3':'1fr 2fr',
 '1/2':'1fr 1fr',
 '2/3':'2fr 1fr',
 '3/4':'3fr 1fr',
 'auto-start':'auto 1fr',
 'auto-end':'1fr auto',
}

const Split = styled.div`
   display: grid;
   gap: ${props => sizes[props.gutter] || sizes.lg};
   grid-template-columns:
${props => factions[props.fraction] || factions['1/2']};
`

<Split fraction='2/3'>
  <Main/>
  <Aside/>
</Split>
You will notice that I added auto-start and auto-end to the list. This allows us effectively to say, that column will take up the size it needs and then I will give the rest of the width to the other column. This is great for things like Like input with a button next to it:
<Split fraction='auto-end'>
  <input/>
  <button>Search</button>
</Split>
There are so many more component patterns you can do with CSS Grid and I will share them with you in a future post. In the meantime, if you want to see these two components in action, check out both of these components over at my component library, Bedrock Layout Primitives.

